How to Connect a MacBook to a Monitor?
Monitors
If you’re using a MacBook at work and often need to connect your monitor to it or have a home
office built around a Mac, you’d ideally want the additional screen real estate that an external monitor offers.
You’d assume that connecting just ANY (read, non-Apple) external display to an Apple device
would be a headache, but thankfully, ‘it just works’!
Connecting a non-Apple display to a Mac is uncharacteristically straightforward. No tricks; no
workarounds. All we need are some high-quality peripherals, a Mac, and an MSI monitor to get our setup going
without a hitch.

Note – Although we’re using a MacBook Air here, most Macs that support external displays (as
of 2024) should offer a similar experience.
What Do You Need to Connect an External Monitor to a Mac?
Before you can get your setup going, you’ll need a few things in addition to details about your
Mac. In this example, we’re using a MacBook Air.
- A USB 3.2 Gen 2 Compatible USB Type-C Cable (if you’re not sure about the spec, grab a Thunderbolt 3 or higher cable)
- A free USB Type-C port on your Mac
- An MSI Monitor with a USB Type-C PD port
You could also connect to an external monitor via HDMI if you’re using an older Mac or have a
Dock already. However, in this guide, we’re focused on minimizing the clutter on your desk and will be
connecting via USB Type-C.
Laptops like the MacBook Air can charge and display an output to an external monitor using a
single cable!
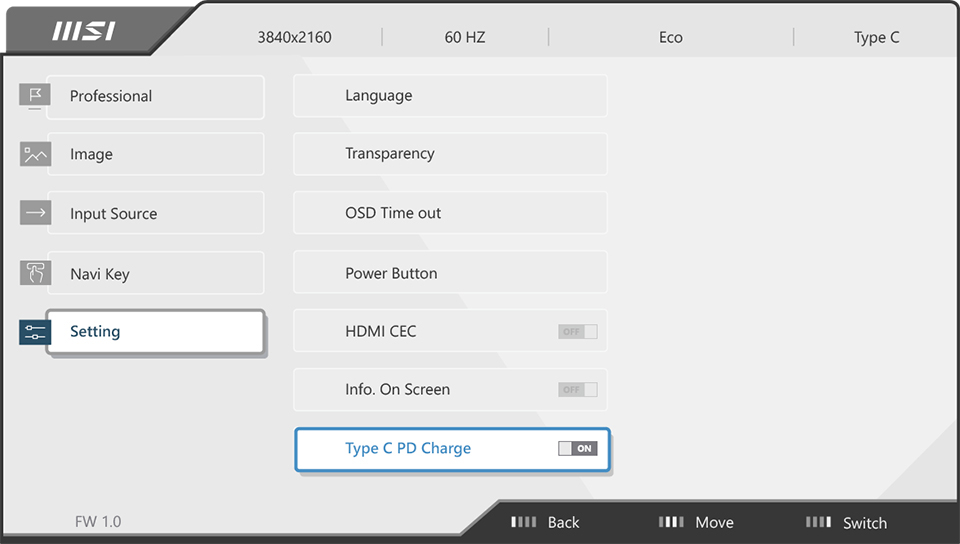
Monitors with USB Type-C Ports that support Power Delivery (USB PD) above 65W enable faster
charging for Type-C powered devices like a MacBook Air. However, you might have to manually enable it via the
monitor’s OSD menu on a compatible monitor.
A few compatible MSI monitors that boast USB Power Delivery of 65W are listed below:
Connecting the Monitor to a Mac: A Step-by-Step Guide
Now that you have everything you need to connect your Mac to an external display, let’s get
started!
1. Connect your monitor and Mac with the Thunderbolt 3 or higher cable (good quality USB 3.2
Gen 2 and above will do as well) using the USB Type-C ports on both devices.

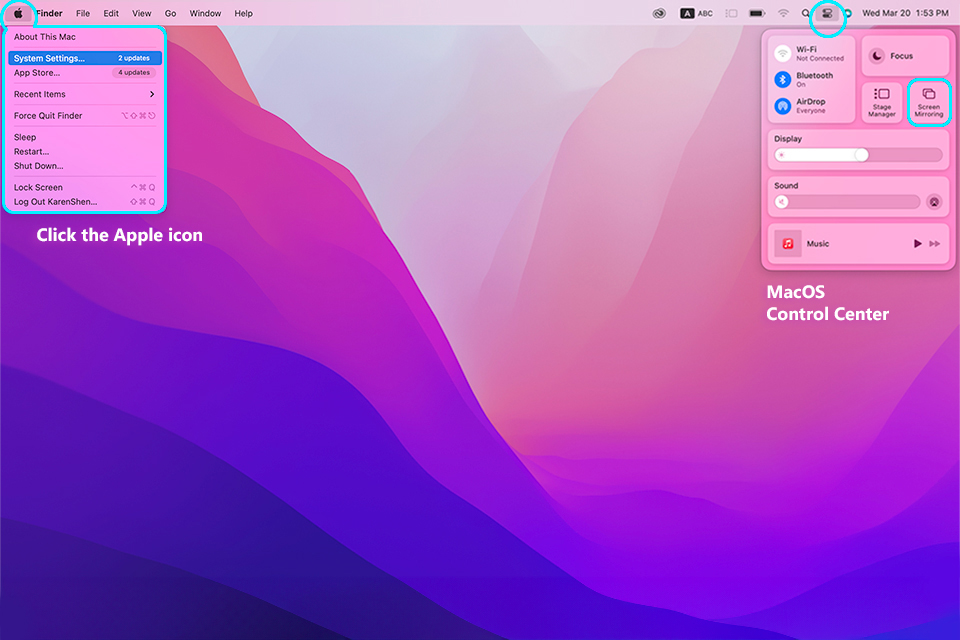
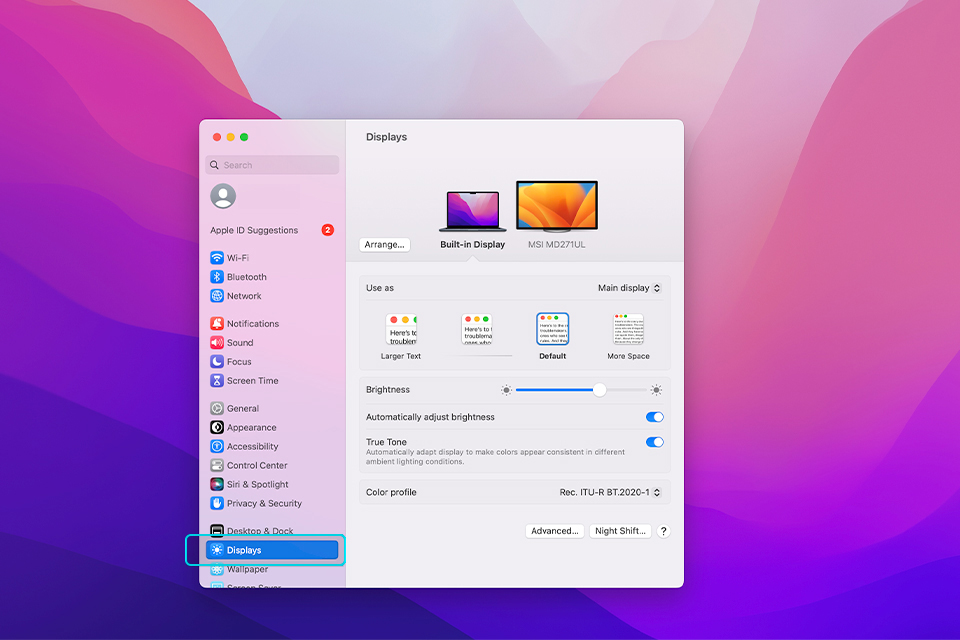
Next, head into your MacOS control center by clicking the icon on the top-right (available only
on MacOS 11 Big Sur and newer). You should see this drop-down now. Click on Screen Mirroring in your Control
Center. You should see the settings window pop up with the Displays option selected. And you can also head to
System Settings directly and select ‘Displays’.
2. As you can see, the connected display shows up here. If you want to use the larger external
display as your primary display, open the drop-down menu when your built-in MacBook display is selected and pick
the “Extended display” option. You can also select the external display and set it as the “Main Display” for the
same result.
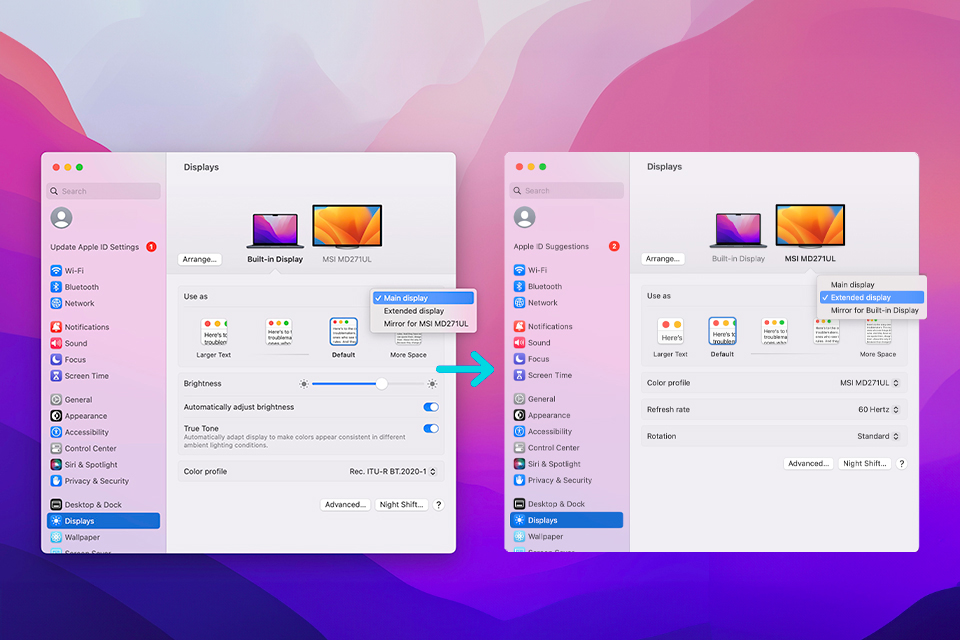
3. Now, select your external monitor. In our case, that’s the MSI MD271UL Business and
Productivity Monitor.
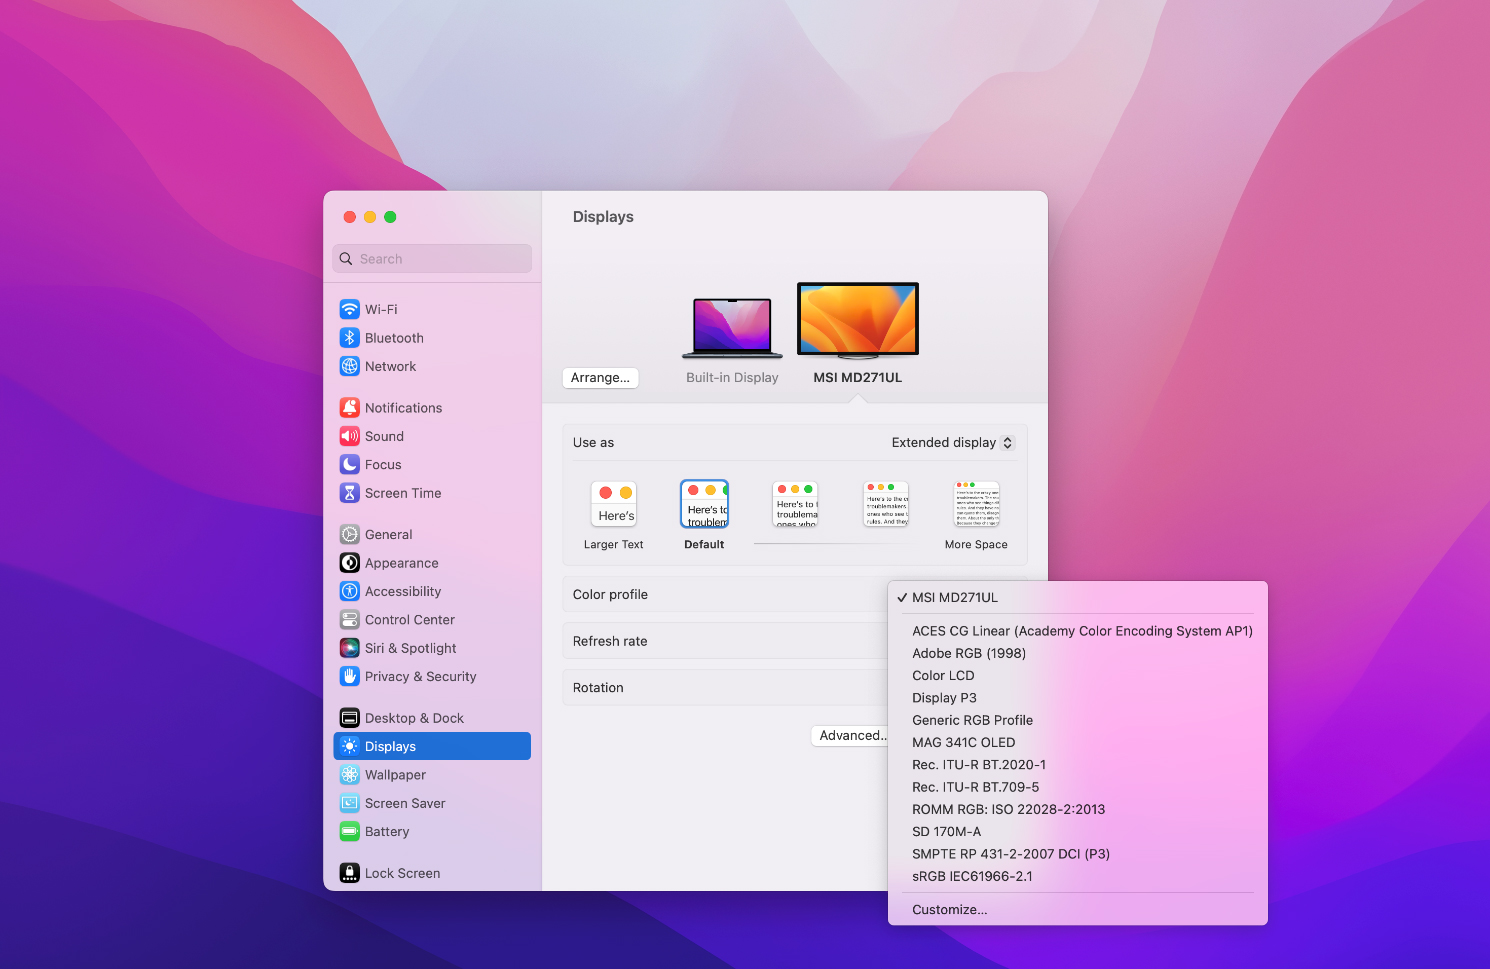
4. Picking the right color profile on your external monitor will apply the manufacturer’s tuned
color settings to your display for the best visual experience. As you can see, the MSI monitor’s Color profile
appears in our drop-down. Of course, if you’re doing professional, color-sensitive work, you might want to pick
a more appropriate color profile instead!
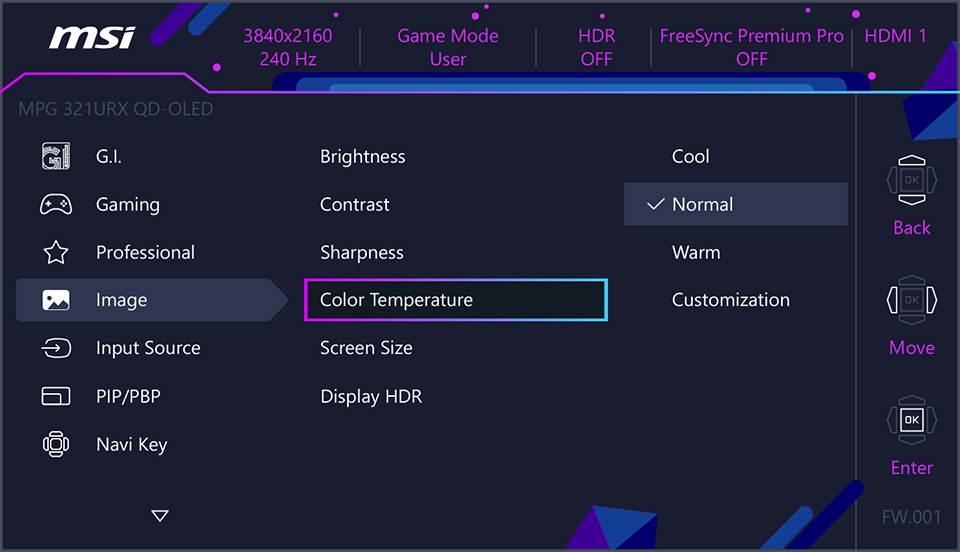
*You can further tweak picture settings using the OSD menu on an MSI monitor (image below) with
options like Color Temperature, Brightness, Contrast, etc.
5. Select it, and you’re now ready to use an external MSI display with your Mac.
6. The “Arrange…” option will allow you to fine-tune your display layout to match your
workspace, so feel free to play around with it to get it just right!
Keep in mind that the quality of the USB Type-C cable matters. So, if you use one that supports
a lower spec – you’ll get odd results at times. For example, one cable might only charge your MacBook, while
another may only manage to send a display signal to your monitor.
If you’re having issues connecting an MSI external monitor to your Mac or can’t get display and
charging to work simultaneously, switching to a good Thunderbolt 3 or higher cable is the most likely fix.
You can follow this multi-monitor setup
guide to connect your laptop to more than one monitor.
To find the best monitor for your needs, please visit our dedicated
page.